
Samsung pushes firmware updates to its Smart TVs to fix bugs, close security gaps, and add features. Some updates install silently in the background. Others sit waiting until you trigger them. Either way, if your TV is running slow, crashing apps, or behaving oddly, there’s a solid chance an update will fix it.
This guide covers all three update methods — automatic, over the internet, and via USB — plus how to check your current firmware version and what to do when something goes wrong.
Why Firmware Updates Matter on Samsung TVs
Samsung Smart TVs run Tizen OS, a Linux-based platform that gets updated much like a phone’s operating system. Each firmware release carries bug fixes, security patches, and occasionally new features or app compatibility improvements.
Samsung supports 2023 and newer models with software updates for up to 7 years. Older TVs typically get feature updates for about two years, then shift to security and stability patches only. As of 2026, Samsung is rolling out Tizen 9 to select 2023 and 2024 models, while the 2026 TV lineup ships with Tizen 10 out of the box.
One thing to know before you start: some settings — picture mode, sound output, and privacy preferences — can reset to defaults after a firmware update. Check them once the update finishes.
Wondering how many update years your specific model still has? The TV Lifespan Health Estimator gives you a quick read based on your TV’s model and age.
Method 1: Enable Auto Update (Recommended)
This is the lowest-effort setup. Once Auto Update is on, your Samsung TV downloads and installs new firmware in the background — usually overnight or while you’re watching. You won’t need to think about it again.
How to turn Auto Update on:
- Press the Home button on your remote.
- Navigate to Settings → All Settings → Support.
- Select Software Update.
- Select Auto Update and toggle it on.
How to turn Auto Update off:
Follow the same path and toggle Auto Update off. Your TV stops downloading updates automatically, but you can still run them manually at any time.
Note: If you accepted Samsung’s Smart Hub Terms and Conditions during initial setup, Auto Update is likely already enabled on your TV.
Method 2: Manual Update Over the Internet
If Auto Update is off, or you want to force an update right now, trigger it manually through the menu.
Requirement: Your Samsung TV must be connected to Wi-Fi or Ethernet.
Steps:
- Press Home on your remote.
- Go to Settings → All Settings → Support.
- Select Software Update, then select Update Now.
- The TV connects to Samsung’s servers and checks for available updates.
- If an update is found, it downloads and installs automatically. Don’t turn off the TV during this process.
- The TV restarts once the update is complete.
If no update is found, you’ll see a confirmation that your software is current. Select OK to exit.
Most updates finish in 5–15 minutes. File sizes typically range from 300MB to 800MB depending on the update.
If your TV keeps dropping the Wi-Fi connection before the download finishes, this guide on why Samsung TVs won’t connect to Wi-Fi covers the most common causes and fixes.
Method 3: Update Samsung TV Firmware via USB
Use the USB method when your TV has no internet access, when OTA updates keep failing, or when Samsung Support points you to a specific firmware file.
What You Need
- A USB flash drive (empty, formatted as FAT32)
- A computer with internet access
- Your Samsung TV’s model number
Step 1 — Find Your Samsung TV Model Number
Your model number tells Samsung exactly which firmware file to serve you. Downloading the wrong file either fails silently or causes errors.
Two ways to find it:
- On the TV: Go to Settings → Support → About This TV. Your model number and current software version are both listed here.
- On the back of the TV: Look for the label — the model code is printed there alongside the serial number.
Not sure what your model number means? The TV Model Number Decoder breaks it down by series, screen size, and manufacturing year.
Step 2 — Download the Firmware from Samsung Download Center
- On your computer, go to Samsung’s Download Center.
- Search by your model number.
- On the product support page, scroll to the Downloads section.
- Find the Upgrade File (USB type) and select the most recent version. If multiple versions are listed, always pick the latest — it includes all previous fixes plus new ones.
- Download the compressed ZIP file to your computer.
Step 3 — Format Your USB Drive as FAT32
Your USB drive must be empty and formatted as FAT32. Most drives sold today come formatted as exFAT — Samsung TVs won’t recognize them.
Windows:
- Insert the USB drive.
- Open File Explorer, right-click the drive, and select Format.
- Choose FAT32 from the file system dropdown.
- Click Start.
Mac:
- Open Disk Utility (search in Spotlight).
- Select your USB drive from the left panel.
- Click Erase.
- Set the format to MS-DOS (FAT) and the scheme to Master Boot Record.
- Click Erase.
Step 4 — Copy Firmware Files to the USB Root Directory
- Locate the downloaded ZIP file on your computer and extract it.
- Inside you’ll find a folder, sometimes containing multiple files.
- Copy all extracted files and folders directly to the root of the USB drive.
Critical rule: Do not place the firmware files inside a subfolder on the USB drive. The TV scans the root directory only. Files nested inside a folder won’t be detected and the update will fail without explanation.
Step 5 — Install the Update on Your TV
- Turn on the Samsung TV.
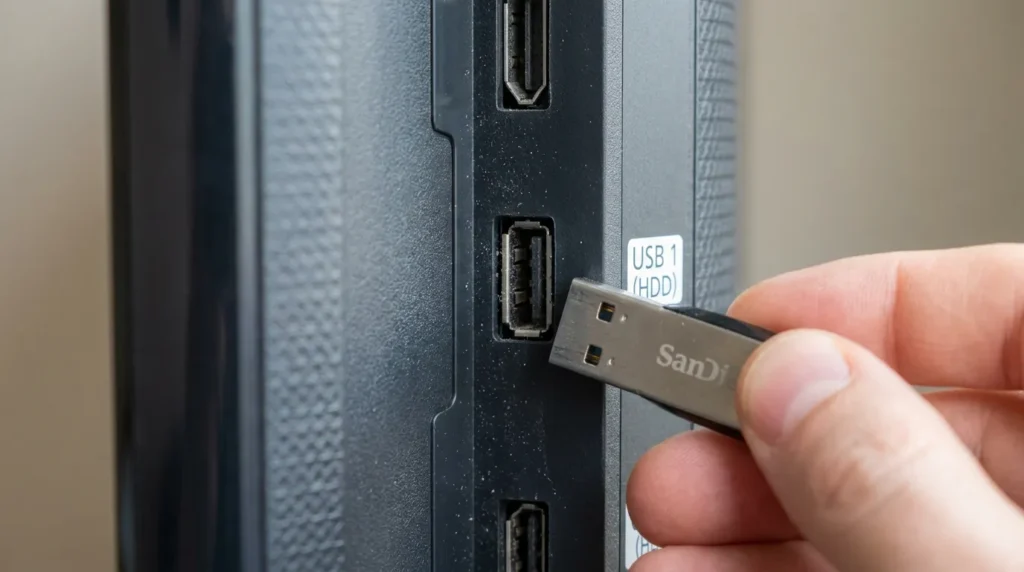
- Insert the USB drive into a USB port on your TV. If your model uses a One Connect Box, insert it there instead.
- Go to Settings → All Settings → Support → Software Update → Update Now.
- Select Yes if prompted.
- The TV scans the USB, finds the update file, and begins installing.
- Do not turn off the TV, unplug the power, or remove the USB drive during the update. Interrupting the process can corrupt the firmware and cause a non-boot situation.
- The TV restarts automatically once the update is complete. Remove the USB drive after the restart.
How to Check Your Current Firmware Version
You can confirm which firmware version is currently installed at any time.
Steps:
- Go to Settings → Support → About This TV.
- The current software version appears alongside your model number and serial number.
This is also the first thing Samsung Support checks when you contact them about a TV issue — knowing it in advance saves time.
Troubleshooting Samsung TV Firmware Updates
Software Update Is Grayed Out
A streaming app or Samsung TV Plus running in the background locks the Software Update menu. Switch to a TV input source (any HDMI input or antenna) first, then try navigating back to the update menu. A full restart — unplugging for 60 seconds — also clears this in most cases.
Update Gets Stuck or Fails
- Unplug the TV for 60 seconds, then retry the update.
- Switch from Wi-Fi to a wired Ethernet connection. Large firmware downloads are more reliable over a cable.
- If OTA keeps failing, use the USB method instead — it bypasses the internet entirely.
If your TV displays an error code during the update process, run it through the TV Error Code Lookup Tool to identify the issue quickly.
TV Doesn’t Recognize the USB Drive
- Confirm the drive is formatted as FAT32, not exFAT or NTFS.
- Verify the firmware files are in the root directory of the USB, not inside a subfolder.
- Try a different USB drive. Some older Samsung TV models have known compatibility issues with USB 3.0 drives. A USB 2.0 drive often works without issue.
Settings Reset After the Update
Picture mode, sound output, and privacy settings are the most common casualties of a firmware update. This is expected behavior on Samsung TVs — not a sign something went wrong.
After any update, check your picture mode, sound output device, and confirm Auto Update is still toggled on.
If your display looks wrong after the update — wrong aspect ratio, black bars, or a stretched image — the guide on fixing Samsung TV not showing full screen covers the most common post-update display issues. If the screen goes dark entirely, the steps in this Samsung TV black screen fix walk through recovery.
Frequently Asked Questions
Will updating Samsung TV firmware delete my apps? No. Firmware updates don’t remove installed apps or wipe your Samsung account. App data stays intact. Settings may partially reset, but your app library remains untouched.
How long does a Samsung TV firmware update take? Most updates complete in 5–15 minutes. Larger Tizen OS version updates — such as the jump from Tizen 8 to Tizen 9 — can take up to 30 minutes depending on your internet speed. The TV restarts once during the process. This is normal.
What is Tizen OS and what version is my TV running? Tizen OS is the operating system Samsung installs on its Smart TVs. Your version is listed under Settings → Support → About This TV. TVs released in 2026 ship with Tizen 10. Most 2023–2025 models run Tizen 8 or 9. Samsung also layers its One UI for TV interface on top of Tizen.
Can I update my Samsung TV if the remote isn’t responding? You need a working remote to navigate the Settings menu. If yours isn’t responding, check the guide on Samsung TV remote not working before trying the update.
How long will Samsung keep updating my TV? 2023 and newer Samsung TV models receive software support for up to 7 years. Older models typically get support until 4–6 years after release, then updates stop. For a full breakdown by model age, see how long Samsung TVs last.
Enabling Auto Update is the simplest long-term move — your TV stays current without you doing anything. When you do need to take manual control, the internet and USB methods both get the job done reliably. The key with USB is two things: FAT32 format and root directory placement. Get those right and the rest takes care of itself.